


How to Add Location to your Photos on Google Photo
We humans love photos and why not? When it allows us to have memories of events or occasions and remember important parts of the event. Whether it was a family get-together, graduation ceremony, or an award night at work, photos help us revisit those moments sometimes again in the future.
Photos are even easily taken now that we have smartphones, from where we can easily share to our friends and followers on social media. What’s more interesting is the fact that we can also add the location where it was taken to the photo, share it, locate it on a map and a host of other awesome things. Google Photos makes this happen and in this post, we are going to examine the things we can do with Google Photos as regards location.
Add Location Information to Your Google Photos on Android and iOS
Google Photos wasn’t built on Android to be able to add location information to your photos. But you can do so from a desktop. Here’s how to do it:
1. On your preferred browser, open photos.google.com .
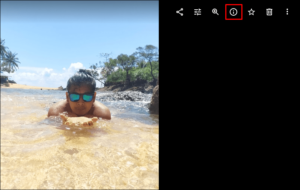
2. Locate and open the photo and then, select the Info icon.

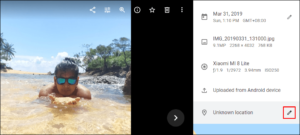
3. Beside the location, navigate to More > Edit Icon.

4. Choose or Add a location..

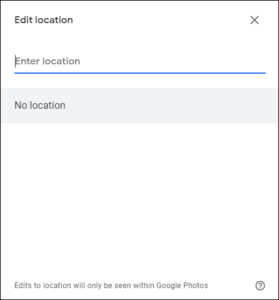
5. To delete a location, click No Location.
Share a Photo and Location in Google Photos on Android and iOS
Only photos that have their location approximated, added or changed can be shared. There are three ways of sharing photos and we outline them below:
Share in a conversation
To add a photo during a conversation or chat, do the following:
1. Launch the Google Photo app
2. Choose the photo you want to send.
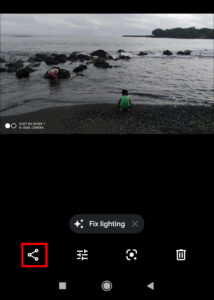
3. Tap the Share icon.

4. Using the Send option in Google Photos, choose the people that you want to receive the photo.
5. Hit Send.
Sending a link or Sharing to another app
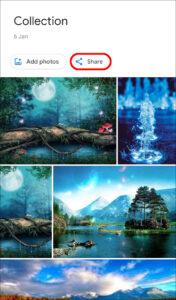
1. Select the photo or album.
2. Tap the Share option.

3. Using the Share to Apps option, choose your preferred app.
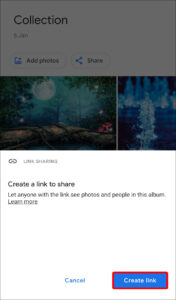
4. Tap Create link to generate a link to be shared.
Creating a shared album:
1. Down the screen, select Photos.
2. Pick the photos you want to be in the album.

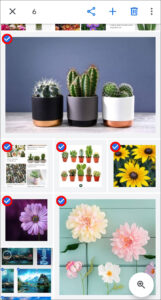
3. Next, select + which is at the top.
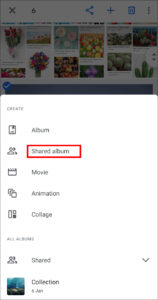
4. Tap Shared album.

5. Give the album a name.
6. Tap Share and choose the people you wish to share the album with.
Delete an Estimated Location in Google Photos on Android and iOS
Google Photos has a way of estimating locations of photos and it does this via Location History or landmarks that are present in the photo.
Google Photo uses your Location History or landmarks identified in your photo to estimate your location. To delete an estimated location:
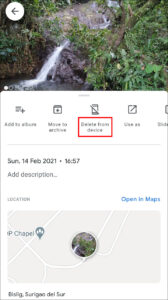
1. Select the photo.
2. Tap the more icon.

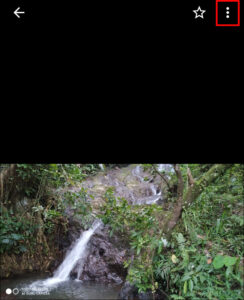
3. Beside location, tap Delete From Device

Locate Photos on a Map in Google Photos and iOS
It is possible to get the location of a photo through a map. Here how to do it on Android:
1. Tap the Search tab down the screen.
2. Navigate to View All from the Places section.
3. Select Explore Map.
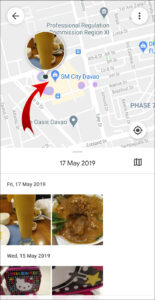
4. Use any the heat areas to locate photos shot that area.

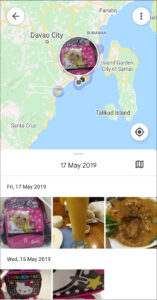
You can zoom in on the heat areas as this will enable you get the locations where your photos were shot.

Rounding Up…
It’s great to find out years later after you took that photo with your friends at the hangout where you exactly took them even after you yourself has forgotten. This location features help you organise and store your photos in a format that brings on memories. We hope you found this article helpful. If you did, why not leave a comment and don’t forget to share.
You can also check out
How To Edit A Zoom Recording
How to Change your Background in Zoom
How to Change Your Name in Zoom Before a Meeting
How to Change Your Name in Zoom During a Meeting
How to Add Photos on TikTok
How to Know Those That Viewed Your Profile on TikTok
TikTok: How To Edit A Video Caption After Posting
How to Check NIN on MTN, Glo, Airtel and 9mobile
DStv Subscription Package, Prices with Channels
Startimes Subscription Package, Prices, And Channel List For Each Plan
GOtv Subscription Package GOtv Max, Jolli, Jinja and Lite Channel List and Price
GOtv Assigned Channel Number with Channel
GoTV Customer Service Contact, Social Media Handle & Email Address
StarTimes Customer Care Contact, Social Media Handle & Email Address
Top 5 Best Web Browsers for Android
Top 5 Best Music Player Apps for Android
Top 5 Best Alarm Clock Apps for Android
Top 5 Best eBook Reader Apps for iPhone and iPad
Top 4 Best VPN Apps for iPhone and iPad
Top 5 Best Apps for Monitoring Data on iPhone and iPad
Top 5 Best Translation Apps for iPhone and iPad
Top 5 Best Alarm Apps for iPhone and iPad
Top 5 Best Calendar Apps for iPhone and iPad
Top 5 Best Photo Editing Apps for iPhone and iPad
Hope with this, you have learnt How to Add Location to your Photos on Google Photo.
Please share and like below, also comment below for any problem faced or encountered.