How to Change Fonts on Google Sheets
Google Sheets is a solid option when it comes to working with data. The app from Google works like Microsoft Excel and they both share many similarities. One great thing about Google Sheets is the numerous customisation options which lets you tweak your spreadsheet the way you want. With this, you can easily filter data, or analyse data better. In this article, you’ll learn how to change fonts on Google Sheets.
How to Change Fonts on Google Sheets
Because Google Sheets is similar to Excel, changing fonts is almost the same on the softwares. You can access the font option in the menu bar, specify the font you want and apply it and that’s it.
If you want the font to be applied on the whole spreadsheet, click on the blank space bridging the first row and first column. When you do this, the whole spreadsheet would be selected and you can then specify a font.
This is just one part of the many customisation options on Google Sheets. You have more but for now we’ll exploring how to change fonts.
How to Change Default Font on Google Sheet
There are times that you don’t want to use the default font and you want something different. Follow the steps below to learn how to change the default font.
1. Go to the top toolbar and select the Format button.
2. Click the theme option and then Customize button.
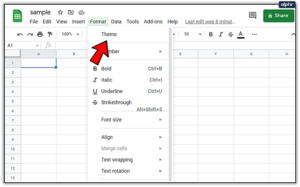
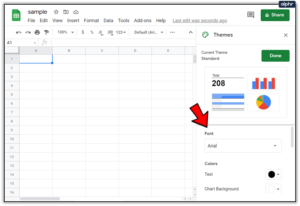
3. From there, select a new font. Hit Done when you’re through with your selection.
How to Tweak Themes in Google Sheets
The Theme Customization has other options within its submenu that allows you to tweak visual settings for your spreadsheet. For example, you can choose a font size you like, change the color for all text. The great thing is that you can save all your settings as a theme so that you can use them in the future.
Navigate File > Save As > Enter your preferred theme name.
Whenever you need the theme settings, you can always apply them to new sheets.
How to Change the Font of a Cell with Text
You can even change the font of specific cells. Learn how to do this with the following steps.
1. Highlight the cells you want to customize and go to the toolbar and select the drop-down arrow beside the default font.
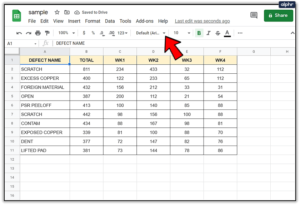
2. Hover over the font option and select your preferred font from the ones in the drop-down menu.
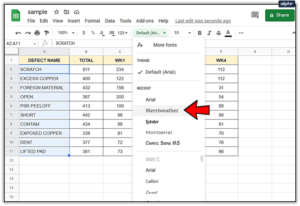
When the font is applied, you’ll discover that those cells have a different font from the rest of the sheet. You can even lock those cells so that only you who is the creator is only allowed to edit it.
How to Add More Fonts to Google Sheets
Google Sheets is heavy on customisation so you can make things look your way. The app also allows you to add new fonts to improve the look of your spreadsheet.
Here’s how:
1. Select the default font option up in the toolbar. From there, select the first option: More Fonts.
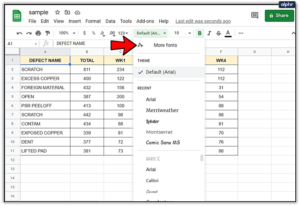
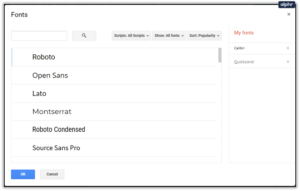
2. Select the new fonts available and then add them to the sheet.
Rounding Up…
Spreadsheet allow you to manipulate data and that’s what Google Sheets offers in its app. It is a robust software that allows for customisation too and as you have learnt here, you can change and customise fonts on your spreadsheet. We hope you found this article helpful? If you did, kindly leave a comment and don’t forget to share.
You can also check out
How to Enable Dark Mode on Telegram
How to Download Music from Spotify
Best Keyboard Apps for Android
Top 5 Best Web Browsers for Android
Top 5 Best Music Player Apps for Android
Top 5 Best Alarm Clock Apps for Android
Top 5 Best eBook Reader Apps for iPhone and iPad
Top 4 Best VPN Apps for iPhone and iPad
Top 5 Best Apps for Monitoring Data on iPhone and iPad
Top 5 Best Translation Apps for iPhone and iPad
Top 5 Best Alarm Apps for iPhone and iPad
Top 5 Best Calendar Apps for iPhone and iPad
Top 5 Best Photo Editing Apps for iPhone and iPad
Hope with this, you have learnt How to Change Fonts on Google Sheets.
Please share and like below, also comment below for any problem faced or encountered.
Leave a Reply