


How to Add or Delete Calendars on iPhone and iPad
We go through days, weeks, months, engaging in one activities or the other. It may be work, personal activities or pleasure, but time has us doing something. The bulk of activities that we engage in can seem like time is never enough and even limit our productivity.
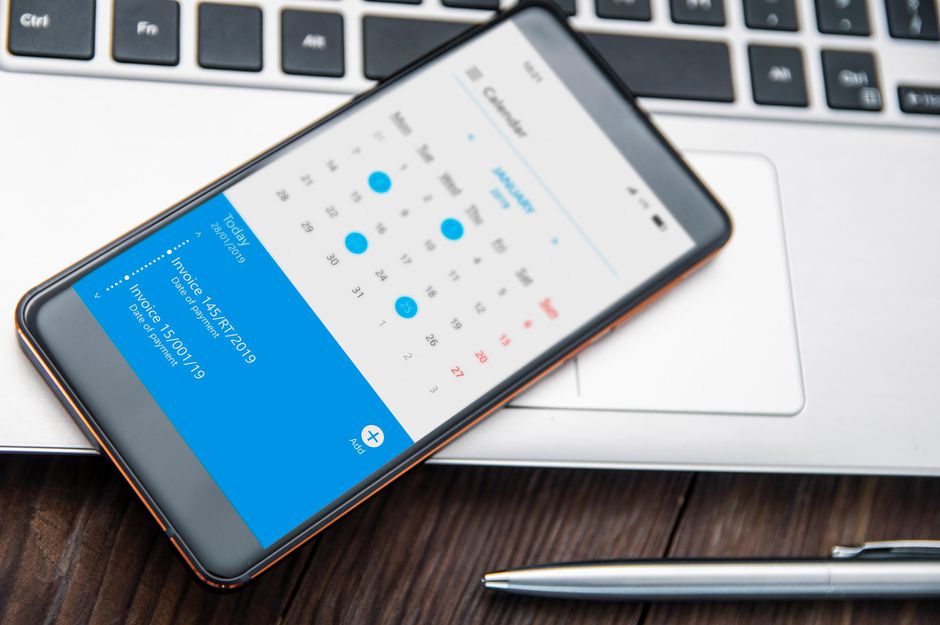
For optimum productivity, it is important to organise our lives, manage our time, and program our schedules effectively. This is one of the advantage of using a calendar app. While calendars were traditionally used to check date, they have evolved digitally to help us manage our schedules and appointments.
The stock calendar app on iPhone and iPad helps you achieve this. In this post, we teach you how to add multiple calendars on iPhone and iPad.
Multiple Calendars? Why You Should Have Then
In a world where we can be caught up with many activities, being organised can’t be substitued for anything. You don’t want to miss an important event just because your calendar was messed up. Having multiple Calendars helps to balance things between your personal and work life. This makes your schedule and appointments organised.
You don’t want a messed up calendar that makes things more difficult rather than giving you a clear view of what it is you have to attend to for a time.
Having multiple calendar offers you flexibility and the following steps will guide you on how to add them.
Add a Calendar to Apple Calendar on iOS
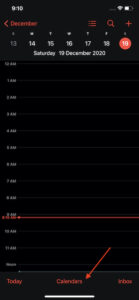
1. Open the Calendar app on your iPhone or iPad.
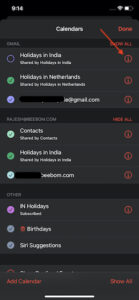
2. Next, tap the Calendars tab which is located down the screen.

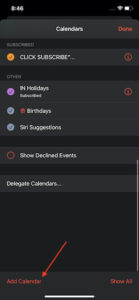
3. Check the bottom left corner and locate the Add Calendar option. Tap it.
4. Assign a name and customise your calendar.

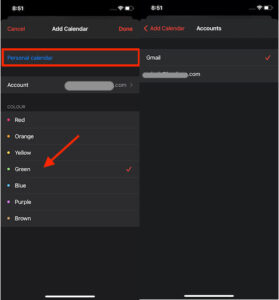
You can select a color you like and even choose your preferred account.
5. When you’re done, complete the process by hitting Done.
And a calendar will be created. You have now been able to add a calendar to the calendar app on your iOS device.
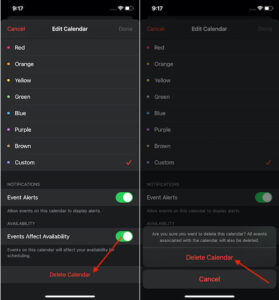
You can even edit the calendar you just added. Simply tap the “i” icon beside the calendar and you will be taken to the editing page.
Delete Calendars from iPhone and iPad
You may feel the need to do away with a specific calendar and it is possible to delete it. The steps to do this are simple and easy.
1. Launch Calendar on your iPhone or iPad and tap the Calendars tab below the screen.

2. Next, tap the “i” icon which is close to the calendar you wish to delete.
3. What you should do next is to tap the Delete Calendar option which you’ll see at the bottom.
You’ll see a pop-up menu that reads “Are you sure you want to delete this calendar? All events associated with the calendar will also be deleted.” Tap Delete Calendar and the process will be finalised.
And that’s how to add multiple calendars on your iPhone and iPad. The advantage of having multiple calendars is unquantifiable as you want to be so organised not to miss an important appointment. We do hope you found this article helpful. Please don’t hesitate to leave a comment and share this post.
You can also check out
How to Enable Dark Mode on Telegram
How to Download Music from Spotify
Best Keyboard Apps for Android
Top 5 Best Web Browsers for Android
Top 5 Best Music Player Apps for Android
Top 5 Best Alarm Clock Apps for Android
Top 5 Best eBook Reader Apps for iPhone and iPad
Top 4 Best VPN Apps for iPhone and iPad
Top 5 Best Apps for Monitoring Data on iPhone and iPad
Top 5 Best Translation Apps for iPhone and iPad
Top 5 Best Alarm Apps for iPhone and iPad
Top 5 Best Calendar Apps for iPhone and iPad
Top 5 Best Photo Editing Apps for iPhone and iPad
Hope with this, you have learnt How to Add or Delete Calendars on iPhone and iPad.
Please share and like below, also comment below for any problem faced or encountered.