How to Transfer Photos from iPhone to PC
We always take photos with our mobile phones as today’s phones are built with powerful cameras and hardware that enables beautiful moments to be captured. Sometimes, these photos become so many that they are now taking the space that we want other files to occupy or probably we want to enhance and improve the photos, so we have to transfer them to our PC. That said, we almost can’t avoid transferring photos to our computers. The guide was prepared to take you through the process of transferring photos from your iPhone to PC.
How to Transfer Photos from iPhone to PC via Windows Explorer
1. Connect your iPhone to your PC using a USB cable.
2. Open Windows Explorer from your Start menu, or taskbar. You can also open the app with the Windows key + E shortcut on your keyboard.
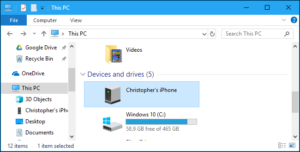
3. Click the arrow beside This PC at the left side of the Window.
4. Locate your iPhone in the storage devices present in the This PC sub-menu.
5. Double-click Internal Storage.
6. Double-click DCIM
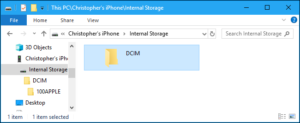
7. Double-click any of the folders there. They should contain photos.
8. Select the images you want transferred.
9. Click Copy To – you’ll see it at the top of the window.
10. Click Choose location to select the destination you want the photos to be in.
11. Click Copy. The transfer process will start. Make sure you don’t unplug your device during the process.
How To Transfer Photos from iPhone to PC via Photos App
If your PC is of an older version Auto Play will appear when you plug your iPhonr into the PC with a USB cable. If you use Windows 8, your device will be detected and you’ll see a message that reads Tap To Choose What Happens To This Device. Clicking fhat pop-up will bring up the option to import Photos and Videos. The other steps to importing are similar to what is explained below. You can also do this on Windows 10. The Photos app of Windows allows for easy import and organisation.
1. Connect your iPhone to your computer using a USB cable.
2. The Photos app should automatically open. If this doesn’t happen, navigate to the Windows Start menu and launch it.
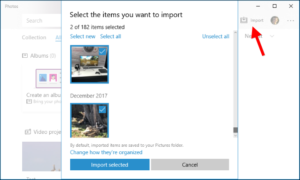
3. Find the Import icon in the upper right corner of the Photos app and click it.
4. A box having new photos for transfer will appear. Select the photos you have in mind to transfer and click Continue.
5. Another pop-up will appear showing you the destination folder the photos will be saved and you have the option to change the location. You also have the option to check the box that reads Delete Imported Items From (Device) After Importing.
6. Click Import.
7. After the import has taken place, you’ll be able to see the photos in the Collections menu or use the Album ivon on the left side bar to open specific albums.
How to Transfer Photos from iPhone to PC via iCloud Photo Library (or Other Services)
If you prefer not to use cables to do the transfer of photos, you can also use online cloud services that allow synchronisation. They won’t only upload photos from your iPhone to the cloud – you can also download these photos from the cloud to your computer.
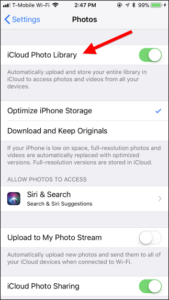
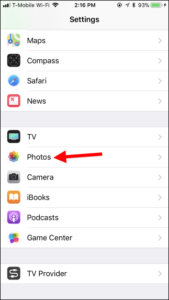
For example, you can use iCloud Photo Library to import photos from your iPhone to your computer. Simply activate iCloud Photo Library on your iPhone by navigating to Settings > Photos and activating “iCloud Photo Library”. When enabled, your iPhone will upload photos to your Apple Cloud account.
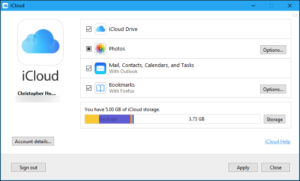
You can then download and install iCloud on your PC, sign in with your Apple ID, and enable the Photos feature in the software. Clicking the Options button allows you to dictate where the photos are stored on your PC And control other settings.
Any photo you snap are automatically taken up to your iCloud Photo Library, and then on your PC, the iCloud app automatically downloads them.
iCloud is not the only service that allows you to sync photos to your PC. There are other services, like Dropbox, Microsoft OneDrive, Google Photos and they all have the automatic photo-upload feature.
You can also check out
Top 5 Best Web Browsers for Android
Top 5 Best Music Player Apps for Android
Top 5 Best Alarm Clock Apps for Android
Top 5 Best eBook Reader Apps for iPhone and iPad
Top 4 Best VPN Apps for iPhone and iPad
Top 5 Best Apps for Monitoring Data on iPhone and iPad
Top 5 Best Translation Apps for iPhone and iPad
Top 5 Best Alarm Apps for iPhone and iPad
Top 5 Best Calendar Apps for iPhone and iPad
Top 5 Best Photo Editing Apps for iPhone and iPad
Hope with this, you have learnt How to Transfer Photos from iPhone to PC.
Please share and like below, also comment below for any problem faced or encountered.