How to record your desktop using the VLC Media Player OR how to use the VLC Media Player has a Screen recorder.
VLC Media Player has lot of features and one the hidden features that VLC has is its ability to used as a screen recorder or used to record the desktop of a computer system or any any of a computer system.
VLC Media Player has capture devices and this can assist to perform screen recording or recording of the desktop environment.
Let’s begin by learning how to record the desktop environment of a Computer System using the VLC Media Player.
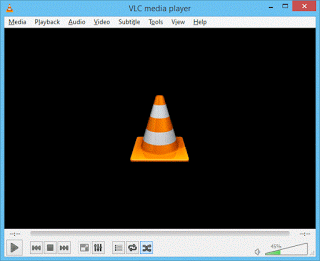
1. Launch the VLC Media Player.
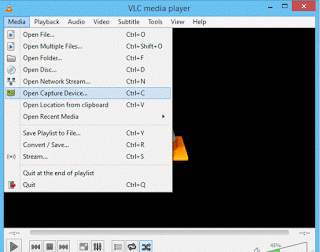
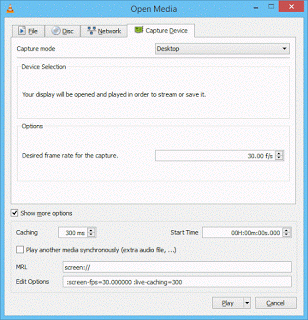
2. On the Menu bar, Click on Media and Click on Open Capture Device or Press Ctrl + C to open Capture Device.
3. A window will open, Open Media
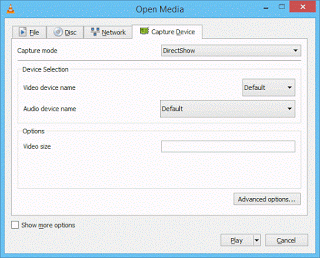
4. On the top, You will see Capture Mode, by default, it is set to DirectShow, Click on it to change it to Desktop.
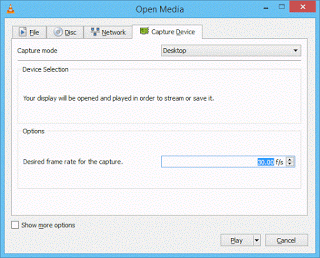
5. Then set the desired frame rate for the capture (I set mine to 30 f/s), you can set it to any frame rate per second You require.
NOTE: To set up more options, Check Show more options below by the left hand corner. You set the caching, starting time and others.
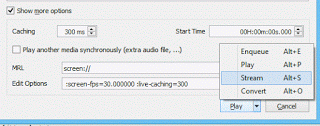
6. Then press Alt + S to stream or on the play button below, expand it to select stream.
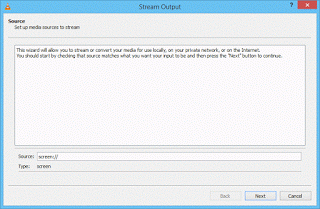
7. A window, Stream Output will open, Make sure source is set to Screen//, then click on Next
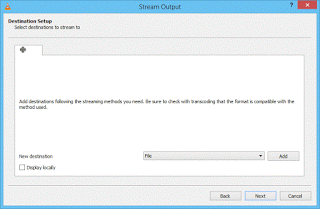
8. Then next is the Stream output destination setup, make sure the new destination is set to File, then Click on Add. A window will come out, then click on browse to choose desired location for storage, then enter desired file name, then click on Save, then click on Next.
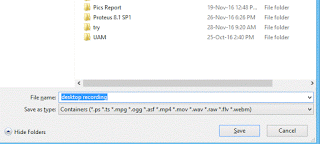
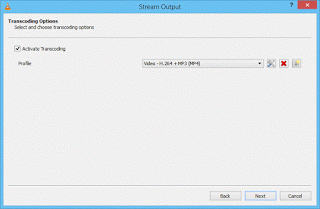
9. The Next is the Stream Output Transcoding Options, set it to the format, that is the video format you want, then click on Next.
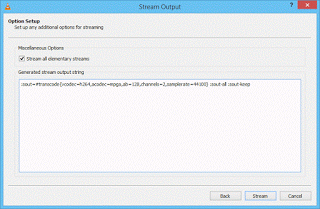
10. Then the Stream output Option setup is next, you could either check stream all elementary streams or not, then click on Stream and the screen recording or desktop recording begins.
11. To Stop the recording, open VLC Media Player window and click on Stop, then go the location where the video was saved and open to see the recorded desktop or screen.

Hope with this, you have been to record your desktop or screen using the VLC Media Player.
Please share below and comment below for any problem faced or encountered.
Footer
About AboutDevice
About Device Provides Specification, Review, Comparison, Features, Price of Phones and Computers, How To, General Computer Problem Tutorials, Solution, Education, Banking and Finance Tips and Tricks with Videos and Images for faster understanding
Disclaimer
Please do not share any personal information in the comment section and do not contact any email placed in comment section.
Please This is Not Bank Website, This is a Blog and we provide reply based on our knowledge. Please any information shared is at Your Risk.
Checkout Full Disclaimer
Dawe Mary says
Awesome! Extremely helpful! Thanks a lot! I never thought that VLC could have such useful function. I will try it later. Aside from using VLC, I’d also recommend Acethinker Online Screen Recorder which I have been using for many years. It is a free web-based tool that lets you record your screen right from your browser. You don’t have to install any additional plug-ins or add-ons.