How to change the Skin of KMPlayer to a skin of your choice. How to use a custom skin or the native skin with KMPlayer .
Skin have been available for a very long.
Skin are how interfaces of software look like, the look and feel of an interface is its skin. Skin also denotes how menus are arranged and how all the User Interfaces of a software is view-able to a user of the particular software.
With KMPlayer , the skin of the media can be changed, just like other players and it is actually easy to accomplish. To change the skin of KMPlayer , Please follow the instruction below:
Change KMPlayer Skin
1. First, you have to download the skin You wish to use. You can see a list of all KMPlayer skin on this link and can download all use.
2. After downloading the skin you want, Launch KMPlayer.
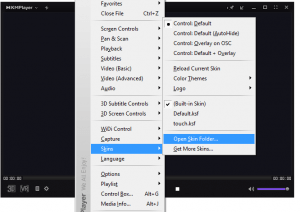
3. Right Click on KMPlayer Window, and click on Skins and click on Open Skin Folder.
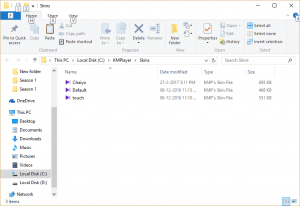
4.The KMPlayer Skin Folder will open (The location of mine is C:\KMPlayer\Skins).
5. Extract the downloaded skin of KMPlayer, and paste the file (usually in .ksf format) in the opened KMPlayer skin folder.
6. Close The KMPlayer Skin Folder, then close KMPlayer.
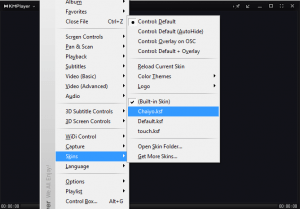
7. Launch KMPlayer, Right Right Click on KMPlayer Window, and click on Skins and then select the skin you want to use (Here I copied the Chaiyo).
8. Immediately, the skin will automatically change to the selected one. Below is a picture of the Chaiyo Skin for KMPlayer.
To revert back to the default skin, you can follow this tutorial
Thanks for learning this, hope you have been able to change the default skin of KMPlayer to one of your choice. Thanks
Please Share and like below. Also Comment Below for any problem faced or encountered.
Leave a Reply