Having an iPhone alongside your Android device isn’t a bad idea afterall. Or maybe you just want to do away with Android and make that giant move to iOS. Whichever way it may be, it is important to move data, and contacts are not left out. Moving contacts between phones may seem like a tough task, but trust us, it’s a breeze. This article provides you with straightforward steps to achieve contact transfer from Android to iPhone.
Transfer Contacts from Android to iPhone via the Move to iOS App
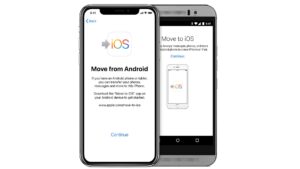
There’s is an app which Apple provides for the easy transfer of data from Android to iOS. This app is known as Move to iOS and is available on the Google Play Store. The app does more than just transferring contacts and can also transfer messages, calendar, photos and videos and other data to your iPhone or iPad. Android phones with Android 4.0 or higher and iPhones with iOS or higher can use the the data transfer app. Note that the app doesn’t transfer apps, but instead of that, it suggests apps related to what you have on your Android device. If there are apps that match, they will either be downloaded or added to your App Store Wishlist. Free apps are downloaded while paid apps are added to your Wishlist.
Transfer Contacts from Android to iPhone via Google Account
Apple has been known not to traditionally support Android users, but Google isn’t like that. Google makes it easy and seamless for their services and features to work on iPhone. Contacts transfer isn’t different as it is possible with a Google Account. It is important that your contacts are already synced with your Google Account. If you have been making use of Google services like Gmail, there is an high probability that your contacts have always been synced but, double-check again. If you have your contacts synced, you won’t have hassles transferring contacts.
On your Android Device:
- Be sure you have your Android phone backed up.
- Launch Settings.
- Navigate to Accounts or Sync (If these are not in your Android device, look for something similar. Android phone manufacturers have their different ways of putting it.)
4. Input your Gmail account credentials and enable synchronisation.
This will cause your phone contacts and your Google contacts to synchronise.
On your iPhone:
- Open the Settings app.
- Navigate to Passwords and Accounts.
- Enter your Google account information in the fields provided.
4. Ensure that Contacts is activated.
And voila! Your Android contacts are on your iPhone.
Transfer Contacts from Android to iPhone via SIM Card
If you don’t want to go through the above methods, then you can use the SIM Card method. In this method, you will have to physically move your SIM card from one phone to another. You should make sure your SIM card has enough space to hold your contacts. Since SIM cards have limited space, it is mostly the contact number and name that will be contained there. You won’t find other details like photo, email, ringtone, etc.
On your Android:
- Open your Contacts app and navigate to Settings.
- From Settings, look for Import/Export contacts and tap on it.
- Select Export all Contacts to SIM.
- The process will start and will complete only if you have enough space in the SIM card.
- Remove the SIM card from your Android device.
On your iPhone:
- Insert the SIM card into your iPhone.
- Wait till it’s detected. Once detected, launch the Settings app.
- Go to Contacts and select Import SIM Contacts.
- The import process will begin and the contacts will be copied and stored in your phone memory.