Facebook is a very popular social media platform that had stood the test of time. With the platform, you can connect with your friends and family from any part of the word. What makes it even more interesting are the features that are added from time to time. One of the features that has been for a long while now is the Location feature. It has undergone improvements over the last few years. In this article, we’ll see How to Switch Location on Facebook..
How to Switch Locations on a Facebook Post
You can change locations on a Facebook post easily follow these steps to do this: you
1. Launch the Facebook app.
2. Next, go to your profile.
3. Look for the post you wish to edit.
4. Next, tap on the three dots icon at the top right corner.

5. When the drop-down menu appears, choose “Edit Post”. After that, tap the location that was set.

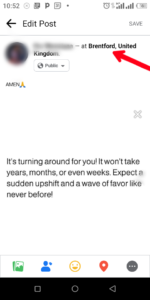
6. After that, remove the location set by tapping the X icon beside the location name.
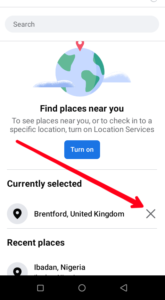
7. Next, tap on the map pin icon which you will see at the bottom of your screen.
8. Next, set a new location, and hit “Save”.
How to Add a Location on a Facebook Post
When Facebook detects that your location settings are enabled, it can automatically add a location tag whenever you want to post. However this may not be available for all devices, so this section will help manually add location to a post. Here’s how:
1. Launch the Facebook app on your Android or iOS device.
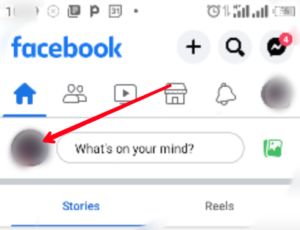
2. Type your post in the “What’s on your Mind?” section.
3. Next, tap the map pin icon.
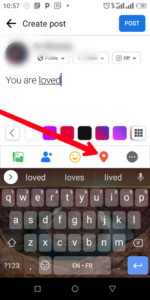
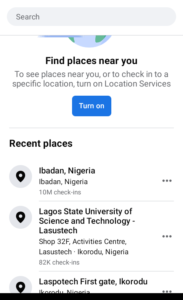
4. Search and select the location you wish to add.
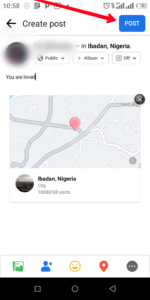
5. Hit “Post” to share the post with the location.
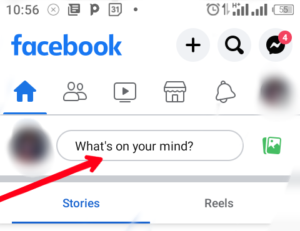
9 Hit “Post”; Source: About Device
How to Automatically Add Location to Facebook Post
Facebook can automatically add location to your posts and stories if you enable location services. When you do this, others can discover your post easily when they perform a location-related search.
On Android
This process may look different for different Android device, but they are all similar.
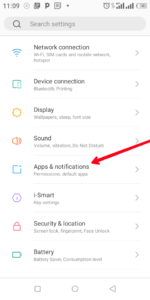
1. Go to the “Settings” app on your Android device
2. Select “Apps & Notifications”. After that select “App Management”
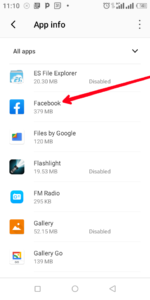
3. Locate “Facebook” from the apps listed, and tap it.
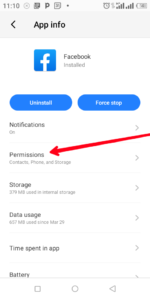
4. Select “Permission”.
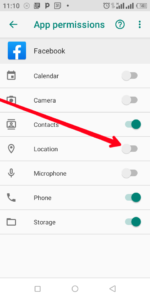
5. Finally, turn on toggle to enable location for Facebook
On iOS
1. Open the “Settings” app on your iPhone.
2. Navigate to “Privacy & Security” and select “Location Services”.
3. Next, tap the toggle button beside “Location Services” to enable location.
Rounding Up…
Facebook has come a long way. Right from the time it was launched in 2004, it has undergone so many upgrades and improvements. These are put in place to improve the experience of users on the platform and help them make meaningful connections, and the location feature is one of them. We hope you found this helpful? If you did, kindly leave a comment and don’t forget to share…