Google Sheets is a spreadsheet application popular because of its cloud features that offers versatility and its integration with the larger Google ecosystem. Google Sheets helps organisation work with data providing powerful tools to process data.
Google Sheets is built around cells, rows, and column. There is a default size for cells, rows, and column, but Google Sheets allows you to enlarge cells. This is what we’ll be looking at in this guide. Let’s dive right in…
Adjusting Cell Height and Width in Google Sheets
There are various ways by which you can adjust cell height and width. Let’s get into it:
Method 1: Changing Dimensions of Cell with Mouse
One easy way by which you can adjust a cell height and weight is to change the dimensions of the row and column that the cell in.
Do this by placing your cursor over the row or column untill your cursor transforms into left and right arrows.
Now, click and drag your mouse to increase or decrease its size.
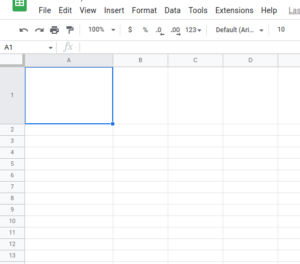
Method 2: Using Menu Commands
Google Sheets also allows you to use menu commands to adjust cells.
1. Start by choosing a row or column
2. Next, right click on it to show the row or column menu.
3. After that, select “Resize Column” or “Resize Row”.
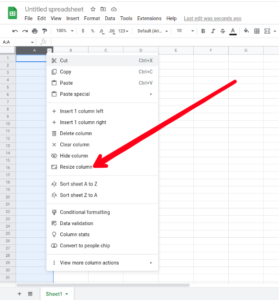
4. Now, enter the size you want to the row or column to be adjusted to. The dimensions are measures in pixels.
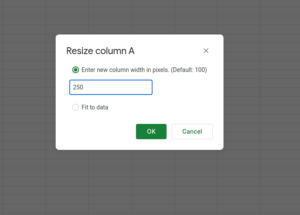
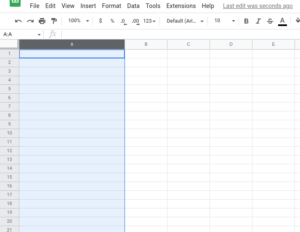
You can also decide to adjust the row or column to Fit to data. With this option, row or column’s size will automatically fit the data inside it.
Method 3: Merging Cells Method
If you wish to edit the size of just one cell, you can do this by merging one or more cells together. With the Merge Cells, Sheets will combine multiple cells into a bigger one. Here’s how to use the cell merging command:
1. First, select the cells you wish to merge.
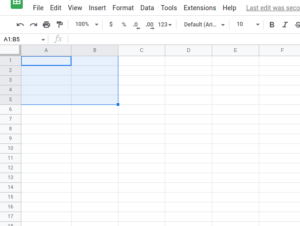
2. Click on “Format” and next, hover place your cursor on “Merge Cells” to bring up more options.
3. Select the type of merging you want to do.
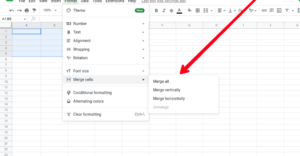
Merge All will combine all the cells you select.
Merge Horizontally will only merge rows together
Merge Vertically will only combine column cells
Unmerge on the other end will seperate all selected cells that are merged.
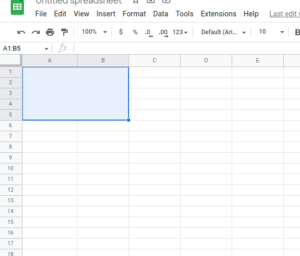
Note that the merge command will not be available if you select cells that can’t be combined.
When cells are merged, the merged cell will take up the name of the top leftmost cell. For example, when cell A1, A2, B1, and B2 are combined, the name of the newly merged cell will be cell A1. Any unmerged cells beside the merged cells will retain their numbering. For example, if merged cell A1 composed of cells A1, A2, B1 and B2, the unmerged cell A3 still remains as A3.
If you use a cell number that is in a merged cell in a formula, the result won’t be an error, rather it will display a blank result or zero. For example, in the example of cell A1 we have given above, if you create a formula =A2*2, the formula will give a result of zero.
Rounding Up…
Enlarging a cell can arise because of different reasons. Maybe the data in the cell is beyond the size, or you want a kind of pattern for all your cells. Merging cell lets you do this and more. We hope you found this helpful? If you did, kindly leave a comment and don’t forget to share.