


How to Organise your Google Keep Notes
In a world with the hustle-and-bustle of activities, the last thing you want to do is to forget important things. It’s important that you are organised and productive. A way to do this is by jotting important things so that you don’t forget or make a to-do list or outline tasks scheduled for later.
Google Keep is a simple and lightweight app that helps you achieve this. The Google-owned app helps you quickly jot notes and gives you a distraction-free environment to do that. The problem with the app is that it is not built-in with sorting features so you will have to use some workarounds to organise your notes. In this article, we give you steps on how to organise your Google Keep notes
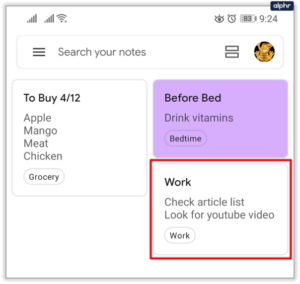
Organise with Labels
Google Keep wasn’t built with a native folder sort function and so you have to creative with it. With some features on Google Keep, you can sort your notes. One of such features is Labels. Here’s how to use to Label on Google Keep:
1. Open the Google Keep app on your device and open the note which you wish to label.
2. Tap the three dots to open the menu. Select Labels or Add Labels if you use a browser.

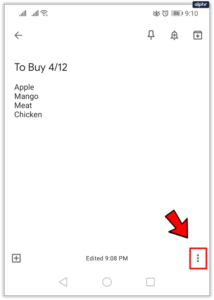


3. Give the new label a name and select Create . If you want to use an already created label, simply select the checkbox beside to them.
The labels will be created.
Organise via Color Coding
Color-coding notes is a way of organising your notes. Google Keep has this feature. Normally notes in Keep have the color, white and black letters, but you can change that and have another better background color. You can then sort the notes by color. Here’s how to do that:
1. Open the Google Keep app and select a note you want its color changed.

2. Tap the Change Color icon and select any color you like.

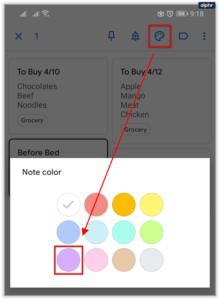
3. If you’re on the website platform of Keep, simply click on the note and select the Change Color option at the bottom. Select the color you like and it will be changed.
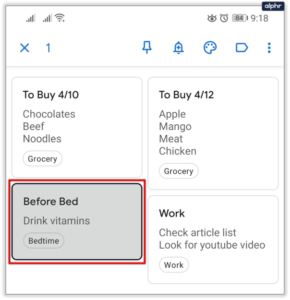
Color-coding helps you to sort your notes in a visual manner. You can use the different colors to group various types on notes (red for work, green for activities, blue for leisure etc).
Organise with Archive
The Archive feature allows you to save notes for later viewing. Notes that fit into this are notes that you just don’t want to be in the home page of Keep but you want them somewhere safe for later viewing. You can add notes to the Archive of Keep using the steps below:
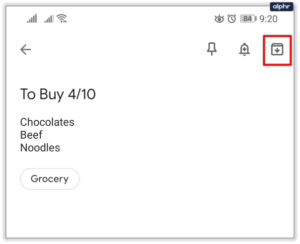
1. Open the Google Keep app or website. Select the note you want archived.


2. Select the Archive button located at the top of the screen. For the website version of Keep, open a note and select the Archive option.

To get to where all your archived notes are, follow the steps below;
On Keep for Mobile, open Keep and tap the menu icon at the top-left corner. Browse the drop-down menu, locate and select Archive. You’ll find all archived item there.
Organise with Pins
Google Keep has the Pins feature that allows you to sort note in order of priority. So you can put the essential notes at the top of other notes. Even if you add more notes, the pinned items will always remain at the top.
1. Launch Google Keep and select a note by long-tappimg it.

2. Tap the Pin icon at the top.

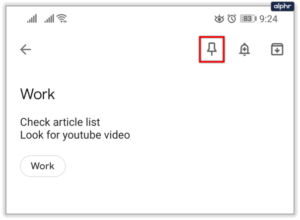
3. For the website version, open the note and select the Pin option.
Rounding Up…
It is interesting to know that without a native sorting feature built into Google Keep, you can still have your notes sorted. And you don’t just have one way to do it, but there are many ways to go about it. We hope you found this helpful? If you did, kindly leave a comment and don’t forget to share.