


How to Insert Images into Notion
In our world of virtual working, we have had many tools come on board to make the virtual working life easier and more efficient. These tools even became more prominent during the Covid-19 outbreak in 2020 and have been ever used since then.
Notion is a project management tool that’s part of these kind of apps. With the tool, you can manage your projects, create to-do lists, timelines and collaborate.
Times can come when you need to insert an image into a photo. Maybe you need to show the team a chart you’re working on, or you want to prepare an article for your company right from Notion, you can do all these in Notion. In this guide, we’ll teach you how to insert photos into a Notion page.
How to Add Photos in Notion on Desktop
The desktop version of Notion allows you to do many things that the mobile version cannot do. Here’s how to add a photo a Notion page:
1. Open Notion and navigate to the page you wish to add the photo to.
2. Next, on the page, type the forward-slash “/” command which will bring up a drop-down menu.
3. Next, go to the Media section and select Image. You can also type “/image”.

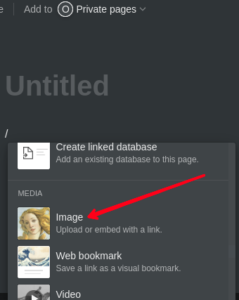
4. A menu will come up with various options. The options are: Upload an Image from your Computer, Embed a Link with One, or Add One From Unsplash.

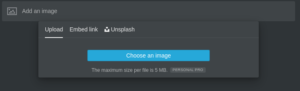
5. When you select an option, the photo will be shown on the Notion page.
Note: Any photo you try to upload shouldn’t be more than 5MB. If it is above, it will not be uploaded.
You can go further to edit the photo. Resize it by dragging the left or right bar to its side. If you like, you can move the photo around and away from the default location.
How to Add a Caption or Comment to a Photo in Notion
After adding the photo to the Notion page, you can still do more with your photo.
Right-click on the image and multiple options will be displayed.
From there, you can
– Add a Comment
– Write a Caption
– Open the original Image
There are other options that are also available and you can use any of them.

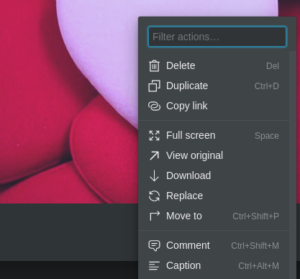
To write a caption, simply select the option, and the caption will be displayed under the photo.
If you click the Original Image option, the image will be opened in a separate tab in a large format.
How to Add Photos in Notion on an Android Device
There’s a Notion app for Android and the app allows you to add a photo. Here’s how to do it:
1. Open the Notion app and navigate to the page you want to add the page.
2. Tap the Image icon which you’ll see on the toolbar.

3. You can upload a file from your phone or use your camera to take the photo.
4. You can also tap on the + icon and select Image from the list. From the list, select Upload an Image, Embed a Link, or select a Photo from Unsplash.
Once you select an option, you’ll see the image on your Notion page.
You can also add a comment to the image or use the menu to access more options.
How to Add Photos in Notion on an iPhone
There’s also Notion for iOS and it works just like the Android app to let you manage your project. Here’s how to add a photo to a Notion Page on iOS:
1. Open a Notion page or you can create a new one.
2. Tap the image icon which you’ll see at the toolbar.
3. Take a photo or choose a file from your device.
Another Method:
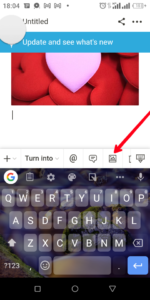
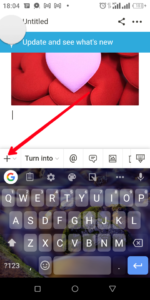
1. Tap the + icon from the toolbar.
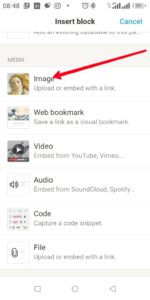
2. Move to the Media section and select the Image option
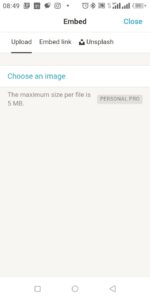
3. Next, select Choose an Image which you’ll see under the Upload tab
4. You can then select Embed Link or Unsplash tab to upload the photo.
Rounding Up…
Notion is a multipurpose app that serves different needs and is for different kinds of people. However, one thing that will be common to people using Notion is them uploading images. This guide just helped with that and we hope you found it helpful. If you did, kindly leave a comment and don’t forget to share…