


How to Add Location Stickers to your Photo on Instagram
Social Media platforms keep evolving and adding new features to stay relevant. When a competitor adds a new and exciting feature the rest are quick to follow to add it or improve on it. It goes to show that the platforms are connecting people together in a fun and exciting way and the competition contributed to this. Instagram added the geotag feature after seeing Snapchat do it.
With geotag, you can add your location to your photo and give your followers a more realistic way to interact with you. As Instagram is known for mostly photos, this feature is really handy on the app for photo-lovers. In this guide, we take you through the steps on how to add geotags to your photos on Instagram.
Adding Locations to Existing Photos
You can tag photos already in your device with their locations. Here’s how you can do that:
1. You’ll need to add the photo. Tap the + icon to do this.
2. Tap Library and then add the photos you want.
3. Select Next.
4. Select your preferred Location Tag which you’ll see in Add Location.

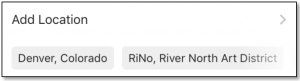
5. The location Instagram would use is the GPS location at the time you took the photo with your device.
How to Add Geotag Stickes to Photos on Instagram
If you’re the type that wants things more beautiful, then you can try geotag stickers available on Instagram. The steps below will show you how to do this:
1. On the Instagram app home page, try taking a photo or creating a story by swiping right.
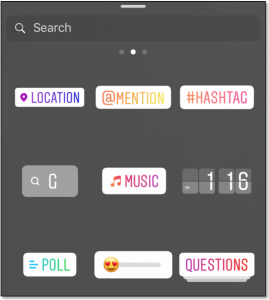
2. Snap the Photo and then tap the sticker icon.
3. Select Location to use a location sticker.

By continuously tapping the location sticker you added, it is possible for you to tweak its font or color
How to Design your Own Instagram Geotag
If you’ve tried searching for a location name, and you didn’t get it, it’s time to create a custom location sticker. You can use the sticker as a customised asset for your business or brand. Here’s how:
1. First, you have to turn on location services by navigating to the Setting app on your device.
2. Select Location Services and next, tap Facebook. Set location access for Facebook based on your device.
3. On your Facebook account, create check-in status at the top on your news feed. You should do this on Facebook and not Instagram.
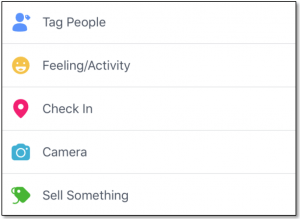
4. Tap the What’s on your mind box and select Check In from the options.

5. Input the name of the location you want. Make sure the first letter is in capitals and that you don’t use any emojis or symbols.
6. Move down the screen and hit the + button to add the location.


7. Select your preferred category for the location. Then select I’m Currently Here.
8. From there, you can go to Instagram to add a new post. You should see the location you just created there.
Rounding Up…
You’ll have seen from this article that it is not hard to add geotags and location stickers. Instagram gives you various options and you can make your photos more location-centric. We hope you found this helpful? If you did, kindly leave a comment and don’t forget to share.