How to Fix Audio and Video out of Sync (Synchronization). Fix for YouTube Videos Using Handbrake
After creating, editing a video, sometimes when you try to upload it on YouTube, YouTube tells you that there is an audio sync issue with video. Well today we will be checking out how to solve this audio and video synchronization problem using a software, Handbrake.
Majorly we will be dealing with the framerate in order to solve this issue, FPS (frame rate per second) is a property of a camera and usually set in the camera, before recording a video, so camera can shoot video at different framerate
depending on the quality of the camera (5, 10, 12, 15, 23.976, 24, 25, 29.97, 30, 50, 59.94, 60 Frame Rate per second, FPS).
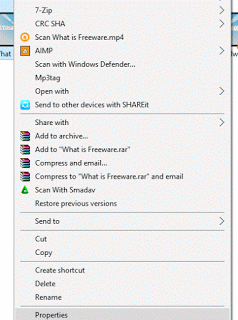
First we need to know at what framerate our video was shot. To do this
1. Go to the location of the video, then the properties window opens, click on Details

2. In the Video section below, you can see the Frame rate, the last on the list, these was shot at 30 frames/second.
After knowing the frame rate at which the video was show, now it’s time to fix the audio and video synchronization (sync) issue using HandBrake.
1. First of all, you need to download HandBrake
2. Install the software Handbrake on Your system with the default settings.
3. Launch HandBrake.
4. Then Click on Source at the top left corner to load the video or videos. If it is a single video, select file, but if it is a folder with more than one video, select folder and then load the folder.
5. On click on either file or folder, you are to go to the location of the file on your hard drive and load it into HandBrake (Mine is in the C drive, downloads folder), then Click on Open.
6. Now we choose destination where fixed video should be kept, go the Destination, Click on Browse and Select Location and Enter File Name, then Click on Save.
8. Now we live the video codec as H.264, but then we change the frame rate (FPS) to the framerate of the video, we got in Properties and check Constant Framerate.
10. Then you then go to the top left corner and Click on Start to begin processing.
11. You can watch below to see the process bar and once it is 100%, the process has been completed and thus the audio and video sync issue has been solved.
12. Go back to the destination folder, and enjoyed your synced (synchronized) audio
and video.
Please share and like below. Comment below for any problem encountered.